React Native 화면 전환 with React Navigation DEV / REACT NATIVE
2020-05-24 posted by sang12
React Native를 이용하여 화면전환 하는 방법을 알아보겠습니다. (https://reactnavigation.org/docs/getting-started/ 해당 페이지를 참고하여 진행하였습니다. )
1. React Navigation을 사용하기 위한 관련 모듈을 설치합니다
npm install @react-navigation/native
npm install react-native-reanimated react-native-gesture-handler react-native-screens react-native-safe-area-context @react-native-community/masked-view저는 아래와 같이 오류가... (This is related to npm not being able to find a file) 오잉.. 무슨오류지 그래서 프로젝트 폴더에 node_modules를 삭제하고 다시 설치 해당 명령어를 입력해서 설치했더니 정상 설치 되었습니다 :). 그리고 추가로 npm install 명령어로 삭제했었던 모듈을 설치해줘야합니다!
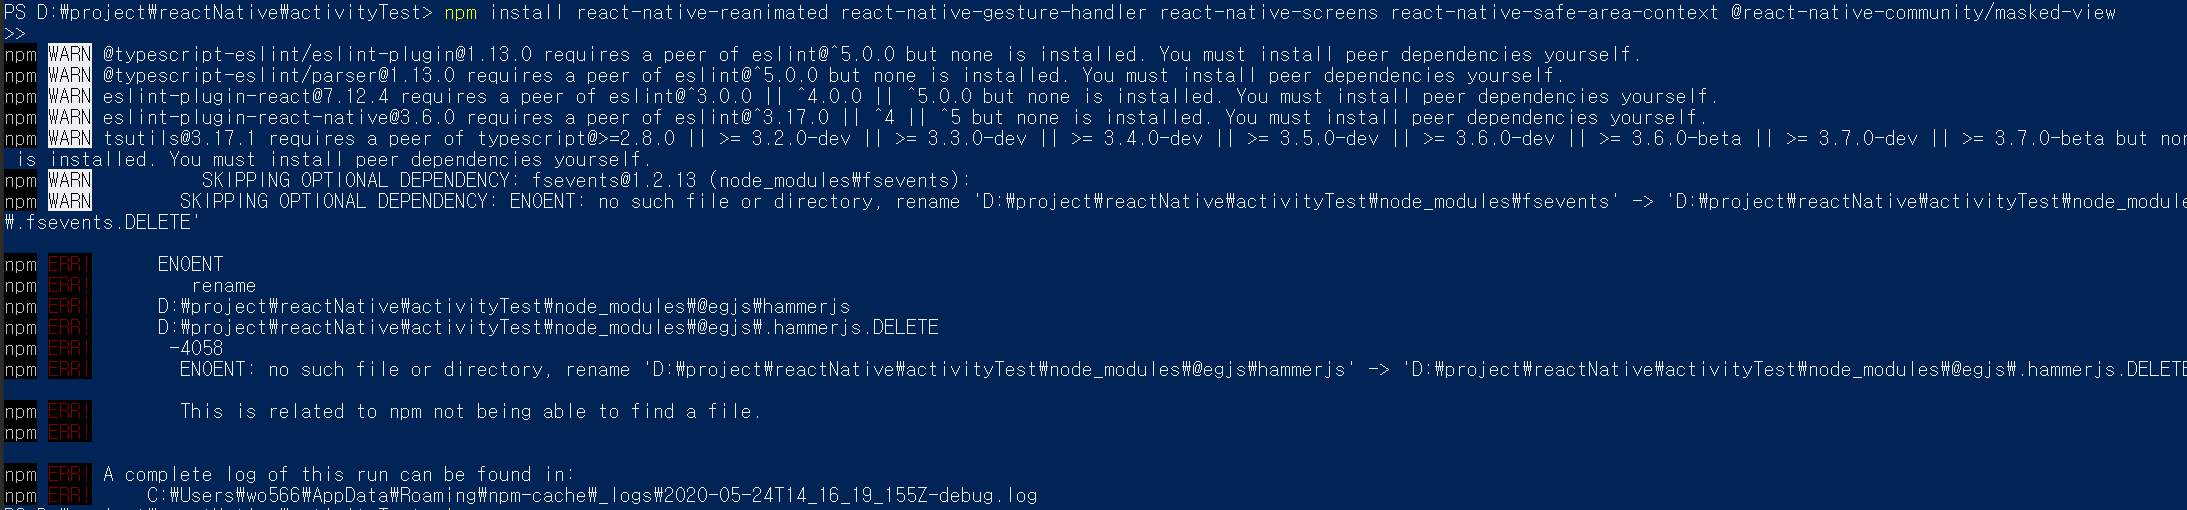
에뮬을 올리는데 오류가나서 모듈을 설치하는 작업을 여러번 반복하게 되네요. 결국 에뮬은 내리고 다시 node-module를 삭제하고 npm install을 통해 다시 설치했습니다 :( 혹시 몰라서 package.json 파일도 공유합니다.
-package.json
{
  "name": "activity-test",
  "version": "0.0.1",
  "private": true,
  "scripts": {
    "android": "react-native run-android",
    "ios": "react-native run-ios",
    "start": "react-native start",
    "test": "jest",
    "lint": "eslint ."
  },
  "dependencies": {
    "@react-native-community/masked-view": "^0.1.10",
    "@react-navigation/native": "^5.4.3",
    "@react-navigation/stack": "^5.4.0",
    "react": "16.11.0",
    "react-native": "0.62.2",
    "react-native-gesture-handler": "^1.6.1",
    "react-native-reanimated": "^1.9.0",
    "react-native-safe-area-context": "^2.0.0",
    "react-native-screens": "^2.8.0"
  },
  "devDependencies": {
    "@babel/core": "^7.6.2",
    "@babel/runtime": "^7.6.2",
    "@react-native-community/eslint-config": "^0.0.5",
    "babel-jest": "^24.9.0",
    "eslint": "^6.5.1",
    "jest": "^24.9.0",
    "metro-react-native-babel-preset": "^0.58.0",
    "react-test-renderer": "16.11.0"
  },
  "jest": {
    "preset": "react-native"
  }
}
2. Mac은 추가 모듈을 설치해야 합니다
npx pod-install ios3. React Navigation import
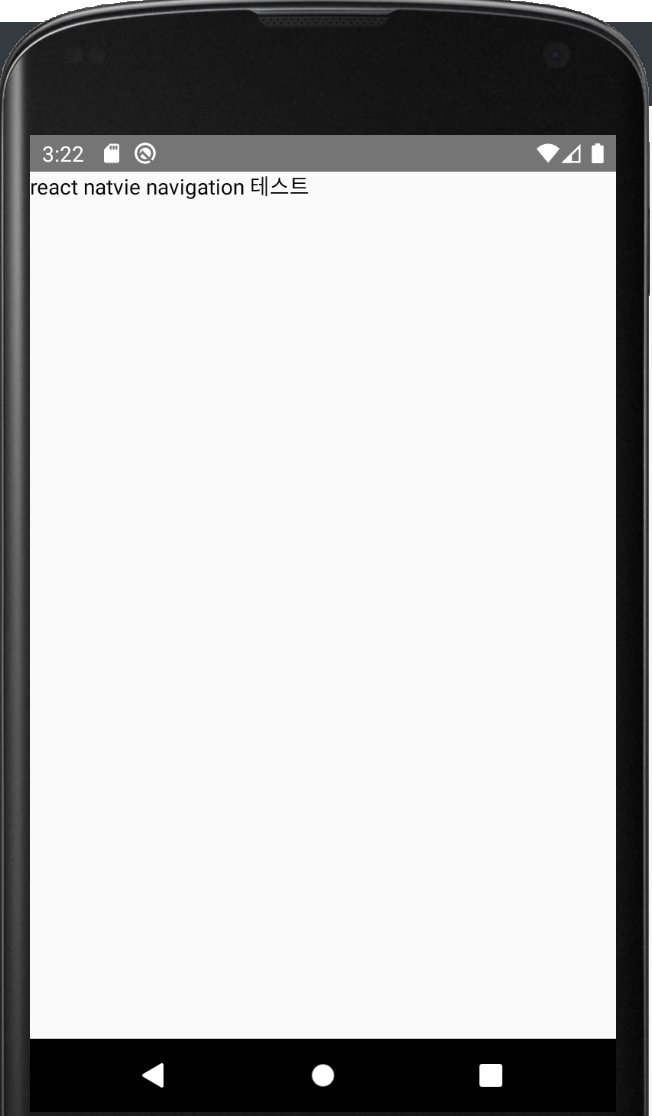
NavigationContainer를 사용하기 위해 import를 해주고 테스트를 위해 gesture-handler도 import 합니다. (모듈이 설치가 제대로 안된경우는 계속 오류가 날겁니다, 안되시면 노드 모듈이 제대로 설치되었는지 확인해주세요). 그리고 NavigationContainer안의 Text가 제대로 나오는지 확인해봅시다!
-App.js
import React, { Component } from 'react'
import {
  Text,
  View
} from 'react-native'

import { NavigationContainer } from '@react-navigation/native';
import 'react-native-gesture-handler';

class App extends Component {

 render() {
    return (
      <NavigationContainer>
        {<View><Text>react natvie navigation 테스트</Text></View>}
      </NavigationContainer>
    )
  }
}

export default App;
4. react-navigation/stack 설치
또 설치를 해야하네요. 한번에 설치하라고 좀 알려주지..!
npm install @react-navigation/stack5. navigation container에 stack 추가하기
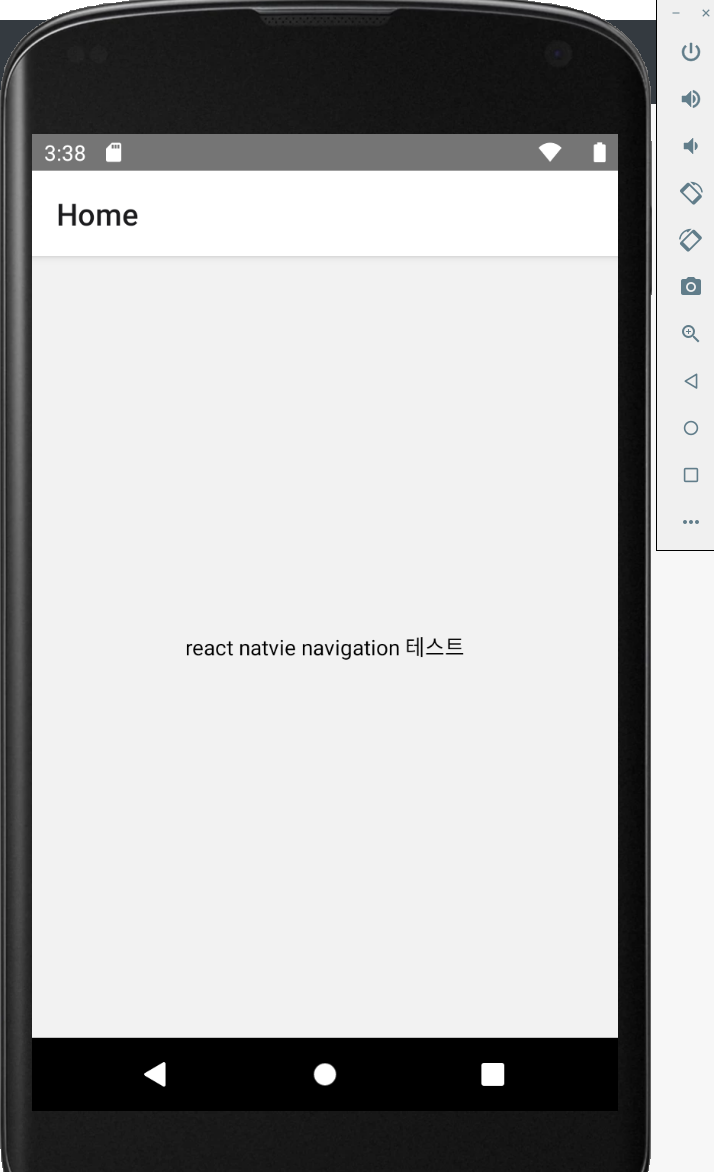
Navigation Container에서 바로 View를 리턴 해줬던 코드에서, stack에 추가하여 화면을 리턴해주게끔 변경했습니다. 그리고 참고사이트의 예제를 보니 스타일도 적용이 되어 있네요 :).
-App.js 수정
import React, { Component } from 'react'
import {
  Text,
  View
} from 'react-native'

import { NavigationContainer } from '@react-navigation/native';
import { createStackNavigator } from '@react-navigation/stack';
import 'react-native-gesture-handler';

function HomeScreen() {
  return (
    <View style={{ flex: 1, alignItems: 'center', justifyContent: 'center' }}>
      <Text>react natvie navigation 테스트</Text>
    </View>
  );
}

const Stack = createStackNavigator();

class App extends Component {
 render() {
    return (
      <NavigationContainer>
      <Stack.Navigator>
        <Stack.Screen name="Home" component={HomeScreen} />
      </Stack.Navigator>
    </NavigationContainer>
    )
  }
}

export default App;
6. Button을 추가하여, 화면 이동하기
-App.js 수정
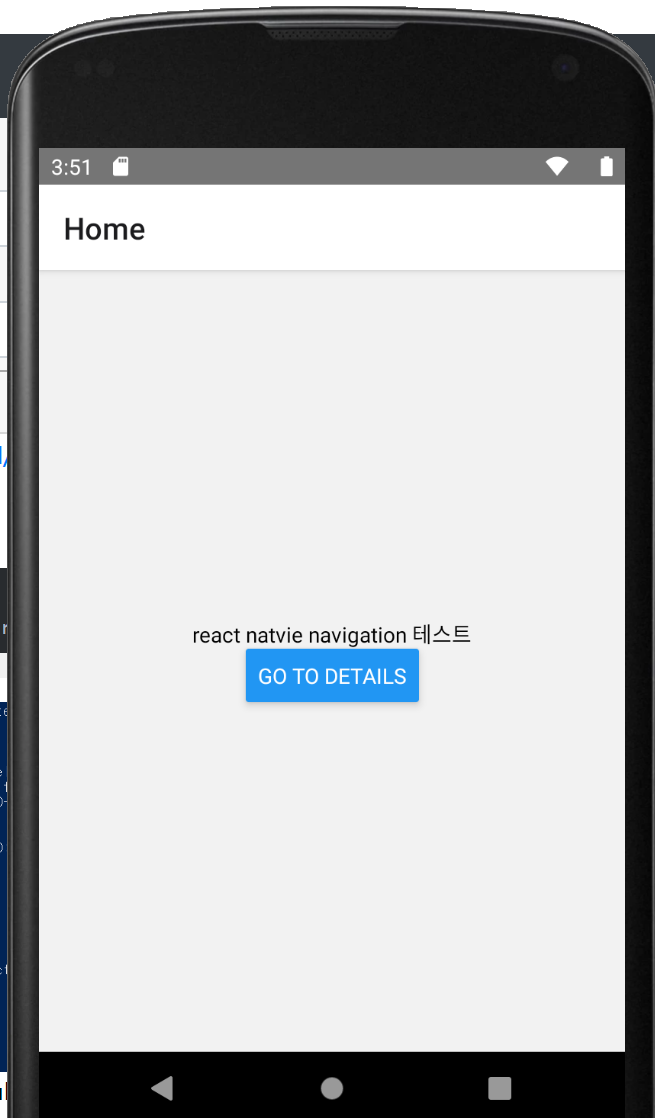
Button을 추가하고 HomeScreen의 인자로 navigation을 받아옵니다. 그리고 버튼이 눌렸을때 navigate함수를 호출하면, 해당 View화면을 불러오게 됩니다.
import React, { Component } from 'react'
import {
Text,
View,
Button
} from 'react-native'
import { NavigationContainer } from '@react-navigation/native';
import { createStackNavigator } from '@react-navigation/stack';
import 'react-native-gesture-handler';
function HomeScreen({ navigation }) {
return (
<View style={{ flex: 1, alignItems: 'center', justifyContent: 'center' }}>
<Text>react natvie navigation 테스트</Text>
<Button
title="Go to Details"
onPress={() => navigation.navigate('Details')}
/>
</View>
);
}
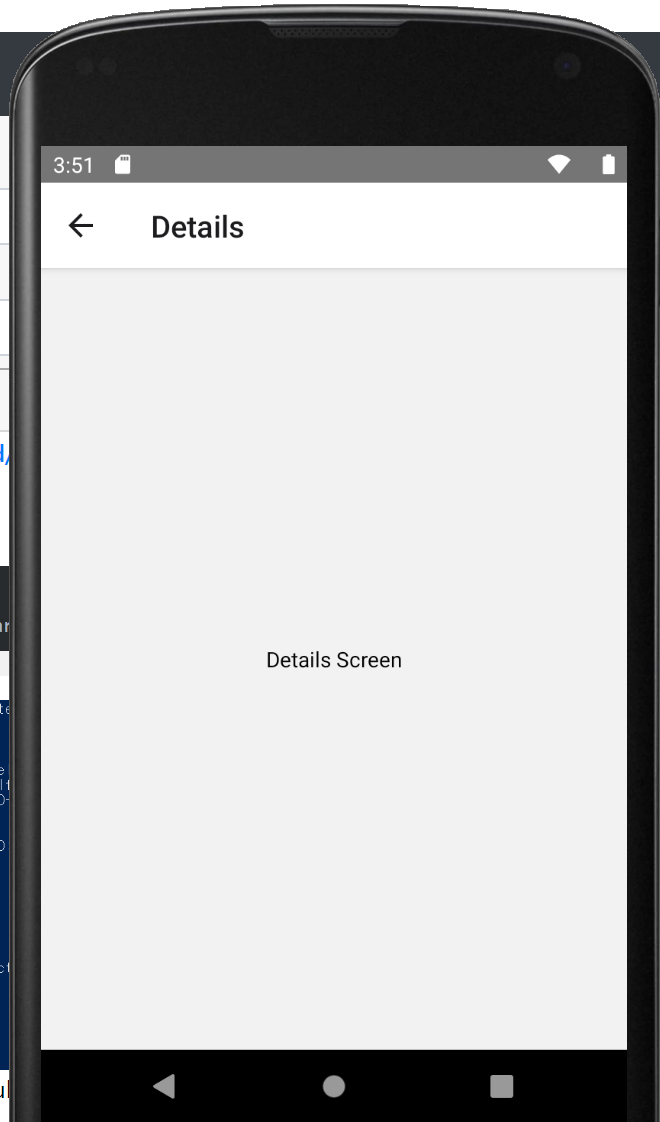
function DetailsScreen() {
return (
<View style={{ flex: 1, alignItems: 'center', justifyContent: 'center' }}>
<Text>Details Screen</Text>
</View>
);
}
const Stack = createStackNavigator();
class App extends Component {
render() {
return (
<NavigationContainer>
<Stack.Navigator initialRouteName="Home">
<Stack.Screen name="Home" component={HomeScreen} />
<Stack.Screen name="Details" component={DetailsScreen} />
</Stack.Navigator>
</NavigationContainer>
)
}
}
export default App;
-결과
이렇게 ReactNative에서 화면을 전환하는 방법을 알아봤습니다. 뭔가 네이티브보다는 복잡시러운거같기도하고, html 태그같이 화면을 만들어주는 게 신기하기도 하네요 ^^